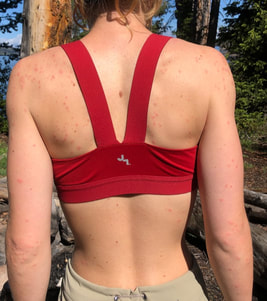
 Through the years, John and I’s traveling has transitioned into much more difficult, adventurous, and epic trips. When we look back at our most recent and 12th overall trip to our nation’s national parks, we see how much we have learned and grown in the three years we have been traveling together. We used to try to hit as many viewpoints as we could in as many parks as we could reach. Check out our very first road trip post here to see what I mean. These days, we have started staying in one place and really trying to go deeper into the protected landscapes.  We just spent five days backpacking through Yellowstone National Park’s backcountry over the Fourth of July week of 2019. This was our first true multi-night backpacking trip, and we learned a lot about ourselves, the equipment we packed, and the trail we took. This post outlines the 10 biggest takeaways we learned from our week in the woods. We hope our hard-learned lessons will help you better prepare for your own trips into any wilderness you might find! (If you want to read more about our experience on the Thorofare Trail, the planning process we went through to get into the backcountry, or more about Yellowstone National Park, check out our blog posts on our Wyoming page here.) 1. Bug spray is not a luxury item. No matter where you are, hiking and camping in the summer, especially around lakes and rivers, will probably include biting bugs. Bug bites are itchy, annoying, and can become infected. Covering bare skin can help, but bug spray adds an additional layer of protection. After bite treatment is great for soothing bites that inevitably happen, and we were glad to have it in our Yellowstone first aid kits. Don’t skimp on either when packing, and as silly as bug net hats may be, I invested in one immediately after our trip to Yellowstone. I suffered several bug bits through my hat in areas where I forgot to put bug spray. I never want to experience that again.
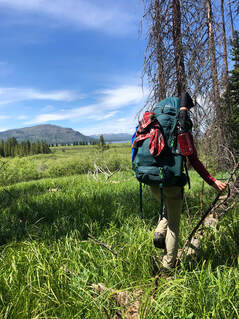 2. Make sure you can actually lift and carry your pack safely. After hiking a few miles, I could barely lift my pack enough to get it on my back. There was one point I actually leaned over too far while trying to climb over a fallen tree and ended up flailing around like a turtle on its back, because I couldn’t stand back up with my bag on. This caused a much more serious problem down the trail when we attempted to cross a swiftly flowing creek (but that was part of the last and most important lesson learned). 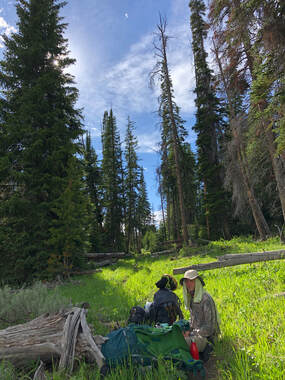 3. Don’t assume that backpacking is the same as hiking. We initially bit off a bit more than we could chew. Our first two days were eight and ten miles respectively, and they were a bit of a struggle. The weight of the packs made us move a little slower than anticipated. We only hiked at about half the speed we normally do. 4. Dig the hole before you go. Just trust me on this one. When you are in the backcountry and have to go, you’re supposed to bury your business at least 6 inches deep. Make sure you remember this before your pants are down.  5. Know where everything is in your backpack. This applies especially to the things in your first aid kit. When John and I faced issues that needed medical attention, it was important that we knew where everything was in order to get it out as quickly as week could. If you want to read what we carried in our pack, check out our Gear Post here. 6. Keep your rain gear close and easily accessible. In the backcountry there is rarely service to check the forecast, and the weather can change instantly. We learned that the 10-day forecast we had read was a sham on the first day when an afternoon thunderstorm rolled in. We also learned that when a storm like that rolls in, you don’t have much time to stop and search for your stuff. Keeping my rain gear at the bottom of my bag was almost a costly mistake, but I learned to keep it in the outside pockets from then on out. 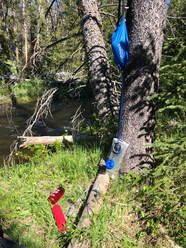 7. Always account for the weight of refilling water. Some of our mornings, we would start off with nearly empty water bottles from the night before. I would always get used to the lighter weight and would struggle on the trail after we refilled our bladders and bottles. Also, leave room for the water in your bag. Don’t pack things too tightly when you are empty, because it’s a pain in the butt to have to repack every time you refill. 8. “Just because I can wear the same pants for four days, doesn’t mean I should.” John learned that he didn’t quite pack enough pairs of pants. He only packed one pair of pants but several pairs of shorts. Shorts and swarming mosquitoes don’t mix. I’m sure his next trip into the backcountry will include fewer shorts than pants. 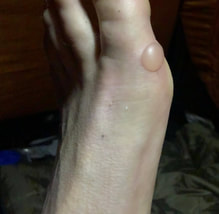 9. If your feet hurt, stop right away. Both of the days that we averaged closer to ten miles, I got blisters on the outsides of my big toes. The first was on the left, and the second was on the right. The second time, I used moleskin to stop the rubbing much sooner than I had on the first which helped stop the swelling. I knew that once my socks started to bunch and rub, it would lead to nothing but pain. 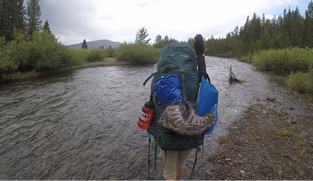 10. Know when it is safe and how to cross a body of water. If you haven’t seen how I was swept by a two foot deep creek, check out this video and post. We instantly learned that we did several things wrong in this scenario. For one, we misjudged the current and depth. Secondly, we didn’t link arms, and thirdly, my pack was too heavy for me. The swift current caused me to lose my footing and fail to regain it. It was almost a disastrous mistake but luckily all it led to was some bumps, cuts and bruises. 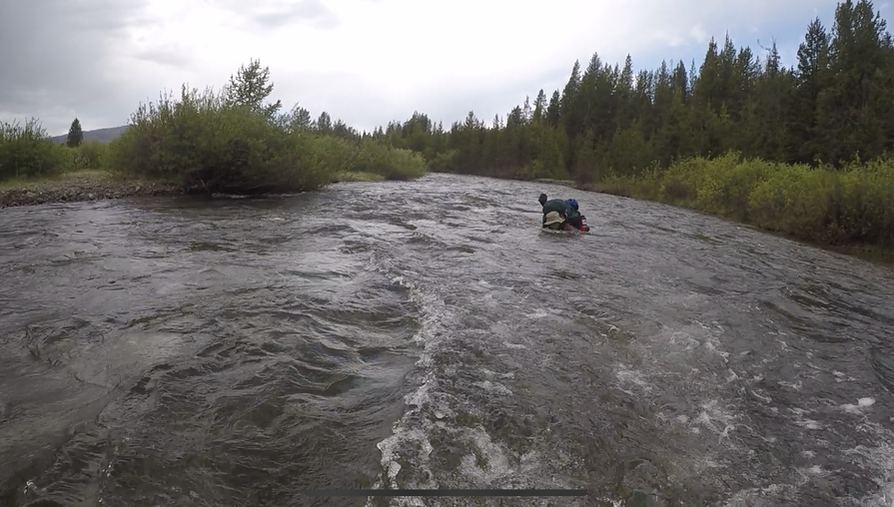 A screenshot of the most unfortunate hiking accident I've experienced. Don't underestimate creeks or rivers. 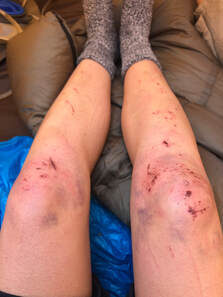 Bonus* - Don’t be ashamed to turn around. There is absolutely nothing wrong with choosing safety over continuing. Sadly, this isn’t the first time John and I have had to turn around, because some of Colorado’s 14ers have gotten the best of us. Slipping in a gushing creek forced us to turn around on Yellowstone’s Thorofare Trail and showed us that we need to be more careful when crossing flowing water. See more of our Yellowstone backpacking trip on our YouTube channel here!
0 Comments
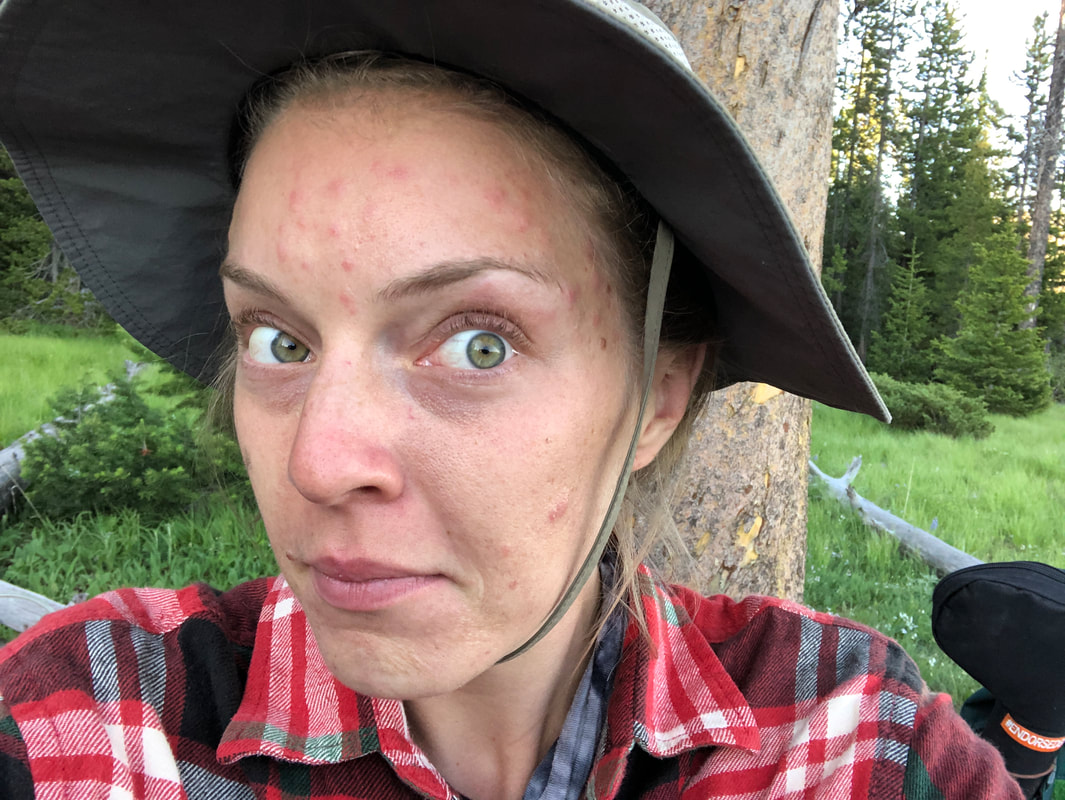
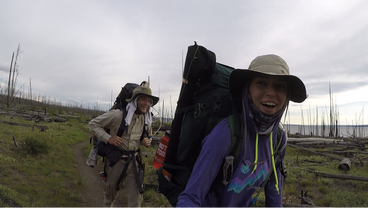 Backpacking is incredibly rewarding, but it requires more planning, research, and preparation than day hiking or camping in developed areas. The additional requirements may seem burdensome, but the payoff of waking up miles away from anything but wilderness is well worth the extra time, money, and effort.  Before our 2019 Fourth of July trip, Taylor and I ended up planning three different trips. We originally thought we could complete segments 24-27 of the Colorado Trail, but recent avalanche damage made some segments impassable. Next, we planned to circle The Cirque of The Towers in the Shoshone National Forest but found that it was holding snow drifts nine feet deep! This caused a temporary panic just one week before we were scheduled to set off, but our previous planning would not be in vain. Taylor and I realized that we had created a pattern of how to best perform our research and planning, so we were able to map out and pack for an entirely new 60 mile trail in Yellowstone National Park’s backcountry in just five days. These next few steps are exactly the steps we took to plan, prepare, and pack for our very first backpacking trip on the Thorofare Trail in the southeastern corner of Yellowstone. Planning:  Planning a trip into the backcountry is usually defined by a window of travel. Taylor and I knew that we could be travelling for eight days, and that window of time kept our search within areas like Colorado, Wyoming, Utah, and some other surrounding states. We limited driving time to ten hours in hopes of limiting our total days on the road to two. From here, we started our search for specific trails. 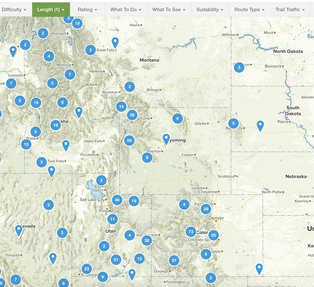 AllTrails map showing trails 20 miles or longer. AllTrails map showing trails 20 miles or longer. The most time consuming aspect of planning a backcountry trip is choosing a trail or combination of trails that can be completed. There are thousands of trails that range from less than one mile to thousands of miles, so selecting a trail or combination of trails can seem overwhelming. A few factors helped us to further narrow our search. Taylor and I knew that we wanted to spend at least three nights camping in the backcountry. Secondly, we knew that the trail had to be a loop trail or out-and-back trail, since we would only be taking one car. Once we’d established these two factors, we were able to discuss what we’re capable of. 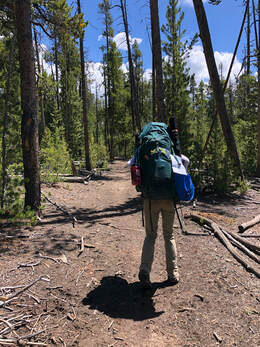 We knew that pack size would really affect speed, but we hadn’t established our speed with weighted packs over multiple days. Without weighted packs, Taylor and I average three miles per hour and can travel up to 20 miles in a day. Our packs were going to be between 40 and 50 pounds and is much more than we have ever carried. We felt comfortable planning for half of our average speed and distance limit. Later in the post we go into more detail on exactly how we packed our bags, but you can read this separate post to see exactly what we carried! With ten miles per day and up to six days of hiking in mind, we focused in on hikes totalling 40 - 70 mile. We scoured backcountry websites, hiking trail websites, and national park maps for options. In all, we saved and compared nearly 20 trails but were able to narrow it down to a handful of favorites using recent reviews, comments, and pictures. Once we started researching each trail, the Thorofare Trail quickly emerged as a favorite. Research: Research is more important than we realized at the onset of this project, and there is a difference between planning and research. Planning involves building an overview of what the trip can be and selecting what seems achievable within that overview. Research involves making sure that selection is safe and accessible. Factors like trail conditions, weather history and forecasts, trail terrain, required permits, and trail opening dates were critical aspects of our research. 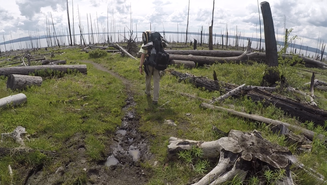 Snow melt also leads to lots of mud. We were fully aware of this before hitting the trail. Snow melt also leads to lots of mud. We were fully aware of this before hitting the trail. How’s The Trail? The most important thing to research once a trail has captured your intrigue is current trail conditions. As we learned, this research is important during any time of the year but especially important if there could still be snowpack. There are several means for checking trail conditions to avoid planning to take an impassable trail. 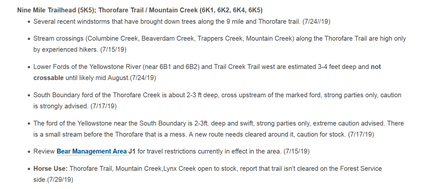 Thorofare Trail condition report from https://www.nps.gov/yell/planyourvisit/situationreport.htm Thorofare Trail condition report from https://www.nps.gov/yell/planyourvisit/situationreport.htm When researching a national park trail, national forest trail, state park trail, or any other trail maintained by the United States government, condition updates can most likely be found on the trail’s respective website. If no trail updates can be found online, there are phone numbers listed that can be used to contact the ranger district responsible for managing the area you’re researching. We found that calling and speaking directly to a ranger about our trail ambitions was the easiest way to gather information. It’s also how we found out our first two planned trips would be impassable. 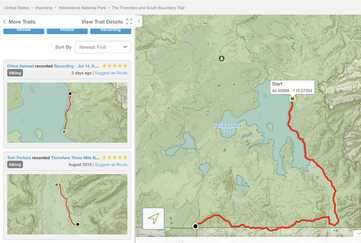 Backpacking and hiking online communities are also excellent resources for condition information and updates. Some like AllTrails allow users to post comments and record the path they took. Recordings are useful for viewing actual trial times and routes taken. Other online forums like Facebook groups are places where questions may be posed for members to answer. We found that these forum styled websites were the best online option for learning about current trail conditions and potential alternative routes. 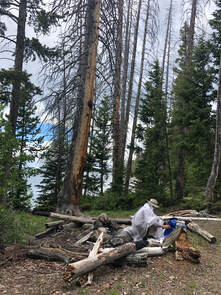 Making lunch before a rainstorm on our fourth day on the trail. Making lunch before a rainstorm on our fourth day on the trail. What’s The Weather Like? Weather records can help provide a glimpse into future weather and may provide an idea of conditions on the ground. Well known sources for weather data provide general data, but there are many resources for specific and historical weather information. The National Centers for Environmental Information website is an excellent resource for specific data such as current snow depths and drought analyses. Weather forecasts are less likely to impede trail exploration, but certain forecasts may encourage additional gear or clothing. That being said, forecasts should be used to gain an idea of possible weather but should not be trusted completely! The forecast for our week in Yellowstone was sunny with little cloud cover, but we experienced more days with afternoon rain showers than days without. No matter the forecast, it is a good idea to, at the very least, prepare for rain. 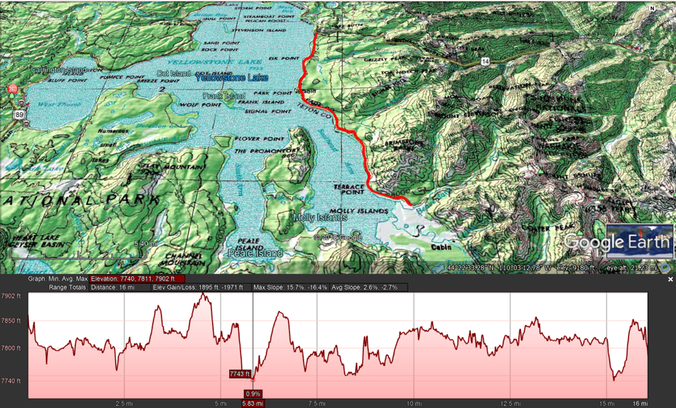 Thorofare Trail to Beaverdam Creek map with elevation profile. Made with Google Earth Pro featuring Earth Point Topo overlay. Thorofare Trail to Beaverdam Creek map with elevation profile. Made with Google Earth Pro featuring Earth Point Topo overlay. What’s Over The Hill? As part of trail condition research, a trail’s terrain should not be overlooked. It is important to become familiar with the land and be prepared for any accompanying features like dramatic altitude changes. Topographical maps are an indispensable resource for researching and planning a backcountry adventure outside of national or state parks. The United States Department of Agriculture website has many topographical maps available for download, and Google Earth is also an excellent tool for creating custom trail paths and analyzing altitude changes along the path. Some trail features are not as obvious or easily discovered through research. Taylor and I were underprepared for the number of vicious mosquitoes that would accompany us on our trek through the wilderness. 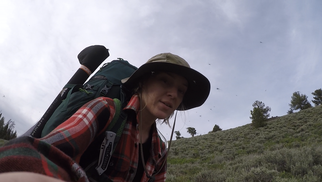 Peep all the 'skeeters around my hat. Peep all the 'skeeters around my hat. If a trail features standing water, make sure to include gear to repel or protect from mosquitoes and other biting bugs. We carried ours in our first aid kits. No matter how much research is performed, each trail will most likely have a lesson to teach once the journey starts. You can read about the 10 Things We Learned on our First Backpacking Trip to see what we mean! 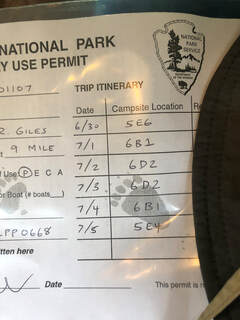 Are There Regulations? Some backcountry trails (especially national park and state park trials) require permits and fees to legally access. These requirements are easily found by visiting the trail’s particular website or contacting the managing ranger station. Taylor and I each paid $3 per night for our permits to camp in the Yellowstone backcountry. The fines for ignoring such regulations greatly exceed the costs of permits, but there are plenty of wilderness areas like National Forests and Bureau of Land Management Areas that do not require payment for access. Though Taylor and I had to learn its importance the hard way, research is imperative to effective backcountry planning and preparation. Once we had properly researched the area we planned to visit, we knew exactly how to go about preparing for our journey into the wilderness of Yellowstone. Preparation: Preparing is the most costly phase of taking a trip into the backcountry. It consists of verifying and checking all of the gear you already own, purchasing any missing gear and consumables, and packing it all together. It’s not the most fun, but watching all of the research and planning come together is one of the most exciting sensations. 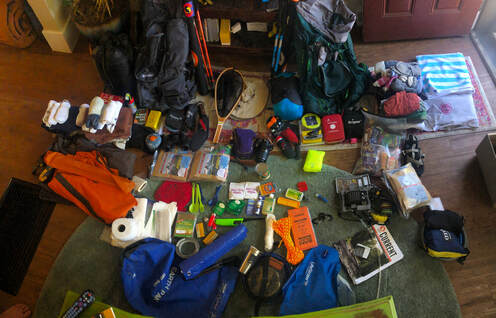 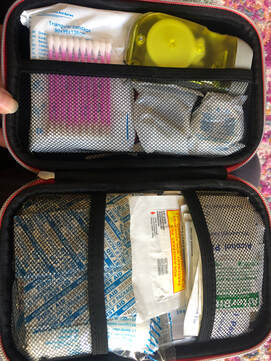 It is important that owned gear be verified and checked for quality before departing. Carrying around a piece of defective gear in the wilderness is disheartening and avoidable. We laid out every piece of gear we owned and tested it before packing up. We had a lot of what we needed from previous trips, but this process also helped us build an accurate list of gear that we needed to purchase. Check out all of the gear we used in Yellowstone in this more detailed post. First aid, and food are, by far, the most important consumable supplies for a backcountry expedition. Our first aid kits needed to be beefed up after we’d taken multiple day hikes. Comparing our kits to several online products and a kit inside REI helped us make sure that ours was complete. Here is a list what we decided to carry in our Yellowstone first aid kits. 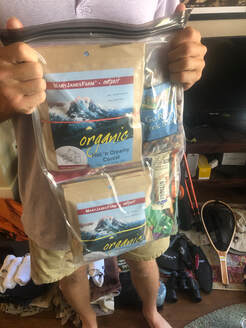 After considering several dehydrated meal brands and packages, Taylor chose to order Mary Jane’s Farm’s, “Alone at Last,” package of 7 breakfasts, 9 meals, 5 soups, and 3 desserts. These meals were more delicious and filling than I could’ve imagined. You can see some of the comparisons Taylor made in her post about making the choice. Packing everything together is the last and most exciting phase of preparing to enter the backcountry. There are several ways to fit gear, clothes, and consumables in a backpack, but I’m always surprised at the amount of stuff I can stuff. No matter how much stuff you can stuff, it is critical to try the pack on once it’s ready for the trail. I always find that something needs to be altered, and those alterations are better done at home than on the trail. 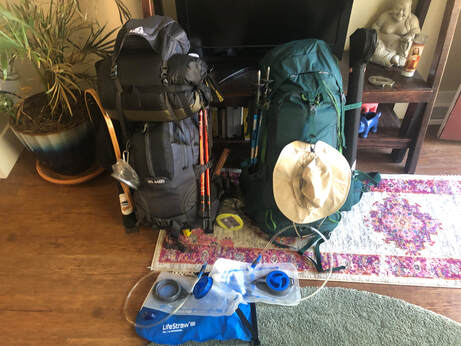 Planning, researching, and preparing for a trip into the wilderness is a long process, but it’s a process best done thoroughly. The process will help you become familiar with where you’ll be and will make it much easier to deal with any changes that must be made to the plan once you’re on the trail. The wilderness is a place of immense beauty and wonder, but it is a place that can take your life. Go prepared and enjoy the treasures of the wild. If you want to see how our trip turned out you can watch our YouTube videos here! |
Talkin' 'bout Tacos
I'm Taylor, aka Tacos! I am sharing my journeys and experiences from across the world hoping to inspire travel and adventure in all who read! Archives
January 2023
|